题目
2Core / 4GB 的总资源限制内,在容器中运行一个基于文本日志文件的统计分析程序,统计发表评论最多的前10位用户,并按顺序返回用户名、该用户的评论次数、该用户不重复的评论数量以及最近发表评论的时间。
- 按照评论次数由多到少进行排序
- 当用户评论次数相同时,将内容不重复的评论数量较多的用户排在前面
- 当“用户评论次数”与“不重复的评论次数”均相同时,以“最近发表评论的时间”排序,内容较新的用户排在前面
正式比赛的数据量级为1000万(可能会有零头,但不低于1000万,不超过1001万),数据文件体积(总和)大约在5GB左右(不低于4.5GB,不超过5.5G),切割为2~3个,最多不超过3个。
解题思路
1. 用什么语言实现
通常情况下,我们认为 I/O 操作是最昂贵的操作,所以我们先选择了几种语言,实现了一个简单的读取 2.5G 文件(4999500 条评论日志)到内存的功能,对比了一下读文件的时间。

没找到 Golang 一次性读取所有行到内存的方法,测试可能不完全公平,但也能说明一定的问题。
选择 Go 作为处理逻辑程序的其他理由:
- 语法简单、并发模型、运行时优化、低内存占用,JNA 调用动态链接库,充分发挥 Go 的处理性能。
- 搭配 channel,实现 CSP 模型。将并发单元间的数据耦合拆解开来,各司其职,这对所有纠结于内存共享、锁粒度的开发人员都是一个可期盼的解脱。
另外为了获得使用 CNAP BP 的额外加分,我们选择 通过 Java 调用 GO 的方式双管齐下。
测试用例
测试环境:Macbook Pro 2019 16寸 Intel Core i9-9880H @ 2.3 GHz 、32G内存、1T固态硬盘
测试代码:
Java: 14.7s
import com.google.common.io.Files;
Files.readLines(new File("hackathon_demo4.log"), Charsets.UTF_8);
Python: 3.83s
# !/usr/bin/python
# coding=utf-8
import datetime
import time

def readFiles(fileName):
    count = 0
    with open(fileName, 'r') as f:
        for line in f.readlines():
            count +=1
    print count
    endtime  = time.time()
    print endtime-starttime
    return

readFiles("hackathon_demo4.log")
Go: 1.79s
package main

import (
   "bufio"
   "fmt"
   "io"
   "time"
   "os"
)

func main() {
   now := time.Now()
   file, _ := os.Open("hackathon_demo4.log")
   buf := bufio.NewReader(file)
   count:=0
   for {
      //遇到\n结束读取
      _, errR := buf.ReadString('\n')
      if errR == io.EOF {
         _ = file.Close()
         break
      }
      count++
   }
   fmt.Println(count)
   fmt.Println(time.Since(now))
}
2. 在限定的资源内,如何高效读取文件
- 单个节点读文件 vs
多个节点读文件 顺序读取多个文件vs 并行读取多个文件- 一个协程读一个文件 vs
多个协程分块读取一个文件 - 缓冲读文件 vs
内存映射文件 - 在比赛环境实测最优缓冲区大小(16mb)
3. 如何去重

串行 vs 并行
我们希望用户评论数据能够每个文件单独计算,再将多个文件的计算结果合并,得到最终结果。
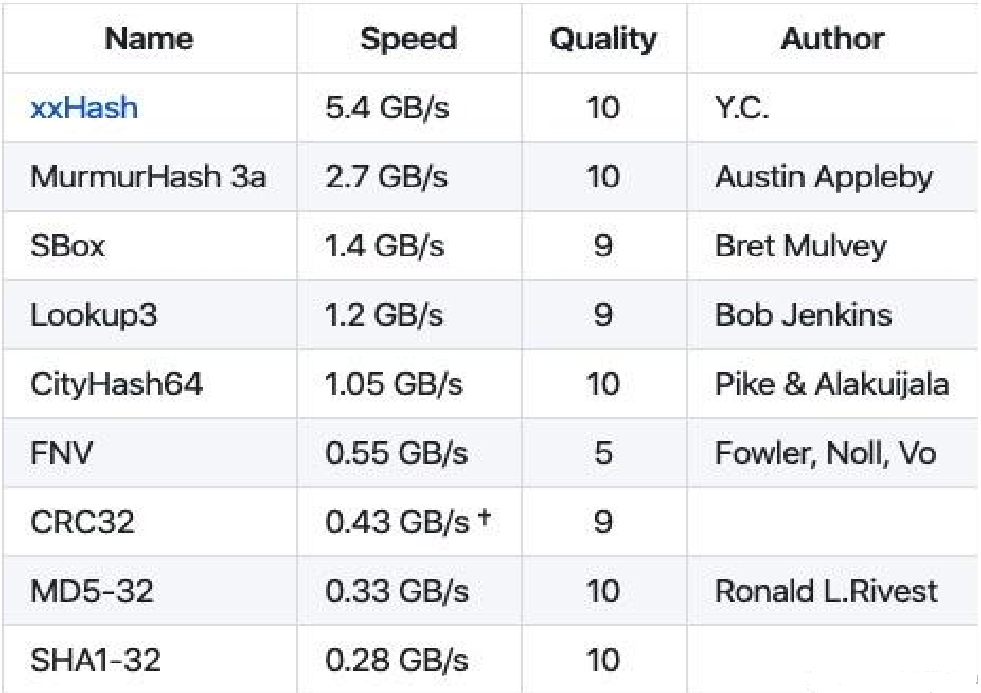
Hash 算法选择:碰撞率 + 计算速度

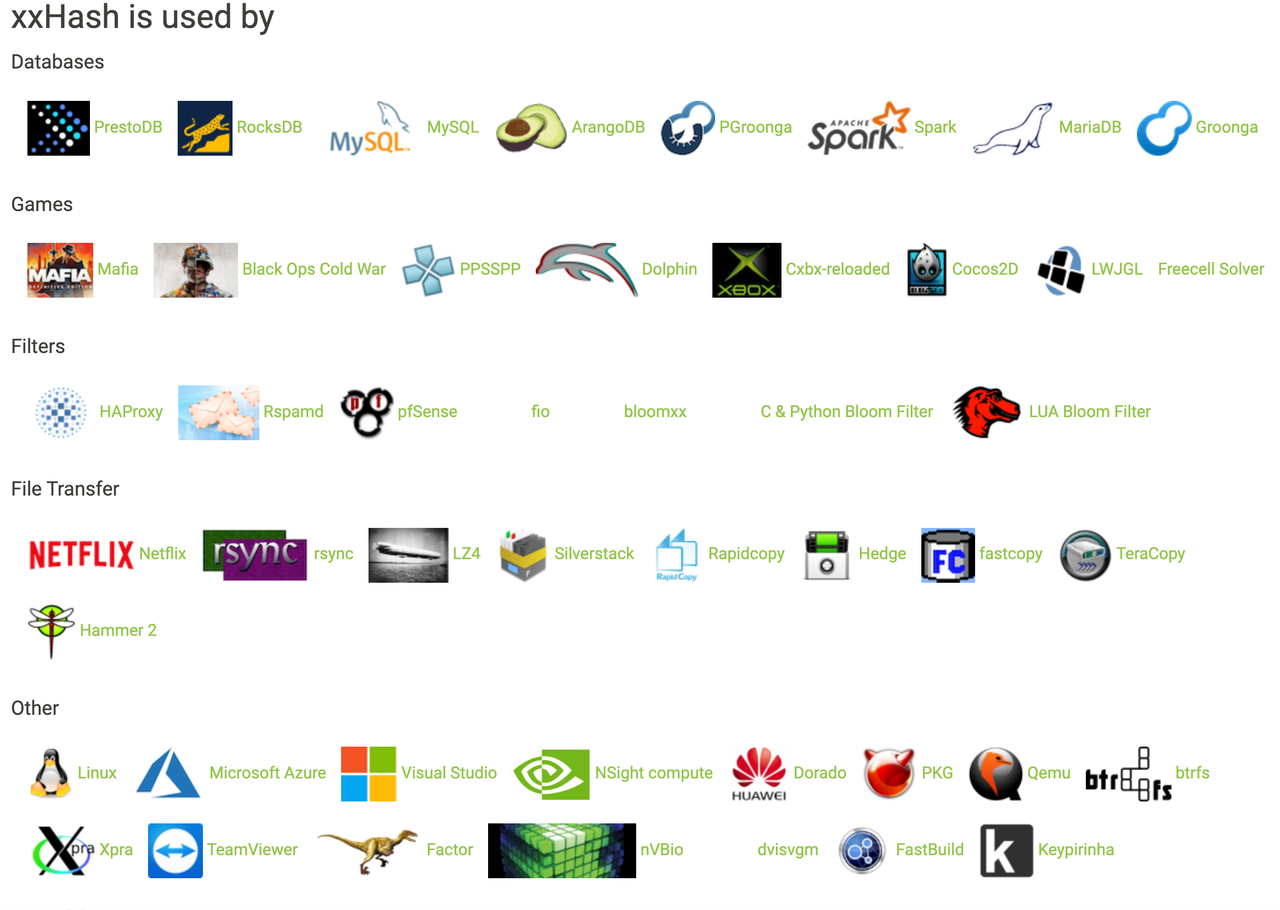
xxHash是一种极快的Hash算法,以RAM速度限制进行处理。代码具有高度的可移植性,并在所有平台上生成相同的哈希(小端/大端)。
选择64位xxHash算法的Go实现(XXH64)
https://github.com/cespare/xxhash
更多信息
SMHasher测试套件评估了哈希函数的质量(冲突、分散和随机性)。还提供了其他测试,可以更全面地评估64位哈希的速度和碰撞特性。
https://github.com/Cyan4973/xxHash/blob/dev/README.md
下面是一些比较Sum64的纯Go和汇编实现的快速基准测试,这些数字是在使用Intel i7-8700K CPU的Ubuntu 18.04上使用Go 1.17下的以下命令生成的:
$ go test -tags purego -benchtime 10s -bench 'Sum64$'
$ go test -benchtime 10s -bench 'Sum64$'| input size | purego | asm |
|---|---|---|
| 4 B | 1052.65 MB/s | 1278.48 MB/s |
| 100 B | 6816.82 MB/s | 7881.09 MB/s |
| 4 KB | 11924.07 MB/s | 17323.63 MB/s |
| 10 MB | 11205.21 MB/s | 15484.85 MB/s |

存储结构
最终选择
结合实际的测试效果,最终选择的方案是:
通过 xxHash 计算评论特征值,并将结果存储到 HashMap 里
4. 如何利用云原生特性

但 2Core / 4GB 的总资源限制,基本打破了我们所有的幻想。。。
架构

实测数据
本地环境单消费者: 8s (8,147,371,410ns)
本地环境双消费者: 7s (7,404,084,150ns)
本地环境四消费者: 6s (6,538,006,176ns)
2.8GHz 四核 Intel Core i7 / 16G DDR3,MacBook Pro,Mid 2015
比赛环境单消费者:22s (22,061,293,165ns)
比赛环境双消费者: 31s (31,530,420,151ns)
比赛环境四消费者:46s (46,479,297,021ns)
2Core / 4GB K8s Container, NFS
核心代码
func hackathon(requestId string, teamId int) string {
    hashMap := make(map[string]Content)

    ch := make(chan []string, 1000)

    paths := strings.Split(filePaths, ",")
    go read(paths, ch)

    for content := range ch {
        commentHash := XXHash(content[2])
        // 判断用户是否存在
        if _, ok := hashMap[content[1]]; ok {
            user := hashMap[content[1]]
            commentMap := user.Comment
            date := user.CommentResult.CommentDate
            nonRepeatedCount := user.CommentResult.CommentNonRepeatedCount
            date = dateExists(date, user.CommentResult.CommentDate, content[0])
            // 判断评论是否存在
            if _, exist := commentMap[commentHash]; !exist {
                commentMap[commentHash] = struct{}{}
                nonRepeatedCount += 1
            }

            // 存在的话,评论次数+1
            hashMap[content[1]] = Content{
                Comment: commentMap,
                CommentResult: CommentResult{
                    CommentDate:             date,
                    CommentUser:             content[1],
                    CommentCount:            user.CommentResult.CommentCount + 1,
                    CommentNonRepeatedCount: nonRepeatedCount,
                },
            }
        } else {
            commentMap := make(map[uint64]struct{})
            commentMap[commentHash] = struct{}{}
            hashMap[content[1]] = Content{
                Comment: commentMap,
                CommentResult: CommentResult{
                    CommentDate:             content[0],
                    CommentUser:             content[1],
                    CommentCount:            1,
                    CommentNonRepeatedCount: 1,
                },
            }
        }
    }

    results := getResults(hashMap)
    sort.Sort(results)
    top10 := getTop10(results)

    re := Re{
        RequestId: requestId,
        TeamId:    teamId,
        Answer:    top10,
    }

    b, _ := json.Marshal(re)
    return string(b)
}
func read(filesPath []string, ch chan []string) {
var wg sync.WaitGroup
wg.Add(len(filesPath))
for _, v := range filesPath {
go func(filePath string) {
f, _ := os.Open(filePath)
//建立缓冲区,把文件内容放到缓冲区中
buf := bufio.NewReaderSize(f, 16*1024*1024)
for {
//遇到\n结束读取
b, errR := buf.ReadString('\n')
if errR == io.EOF {
_ = f.Close()
wg.Done()
break
}
if strings.Index(b, "com.neusoft.oscoe.sample.data.Generator") == -1 {
continue
}
slice := strings.Split(b, "com.neusoft.oscoe.sample.data.Generator - ")
ch <- strings.SplitN(slice[1], ",", 3)
}
}(v)
}
wg.Wait()
close(ch)
}One more thing…
不修改一行代码,仅为容器添加环境变量 GOMAXPROCS,并将其值设置为限制的 Core 数量:
  env:
    - name: GOMAXPROCS
      value: '2'
Round 1
22.574s => 13.489s

Round 2
双消费者:12s (12,263,480,867ns)
四消费者: 9s ( 9,679,350,378ns)

Round 3
之前实测表现不佳的其他方案,都有进一步缩短耗时的可能,感兴趣可以继续进行探索。
原因
- golang 初始化 processor 数量是依赖 /proc/cpuinfo 信息的,容器内的 cpuinfo 是跟宿主机一致的,这样导致容器只能用到 2 个 cpu core,但 golang 初始化了跟物理 cpu core 相同数量的 processor。
- 当 processor 数量比容器实际使用的核心数量大后,上下文切换(cs)明显多起来,另外等待调度的线程也多了,runtime find runnable 时产生的损耗和线程引起的上下文切换造成的损耗,对程序性能影响巨大。
- 官方给出的答案是,这是当前版本的 Go 编译器还不能很智能地去发现和利用容器中多核的优势。虽然我们确实创建了多个 goroutine,并且从运行状态看这些 goroutine 也都在并行运行,但实际上所有这些 goroutine 都运行在同一个 CPU 核心上,在一个 goroutine 得到时间片执行的时候,其他 goroutine 都会处于等待状态。从这一点可以看出,虽然 goroutine 简化了我们写并行代码的过程,但实际上整体运行效率并不真正高于单线程程序。
- 虽然Go语言在容器中还不能很好的自动识别容器中多核心的数量,我们可以通过设置环境变量 GOMAXPROCS 的值来控制使用多少个 CPU 核心,达到多核心的性能发挥。
其他分享内容
Jenkins pipeline stash: Stash some files to be used later in the build
pipeline{
    stages {

        stage('go build') {
            agent { label 'go' }
            steps {
                ...
                stash( name: "libhandle", includes: "gotarget/*.*")
            }
        }

        stage('maven build & docker build & push') {
            agent { label 'maven' }
            steps {
                container ('maven-jdk11') {
                    script {
                        unstash "libhandle"
                    }
                    ...
                }
            }
        }
    }
}
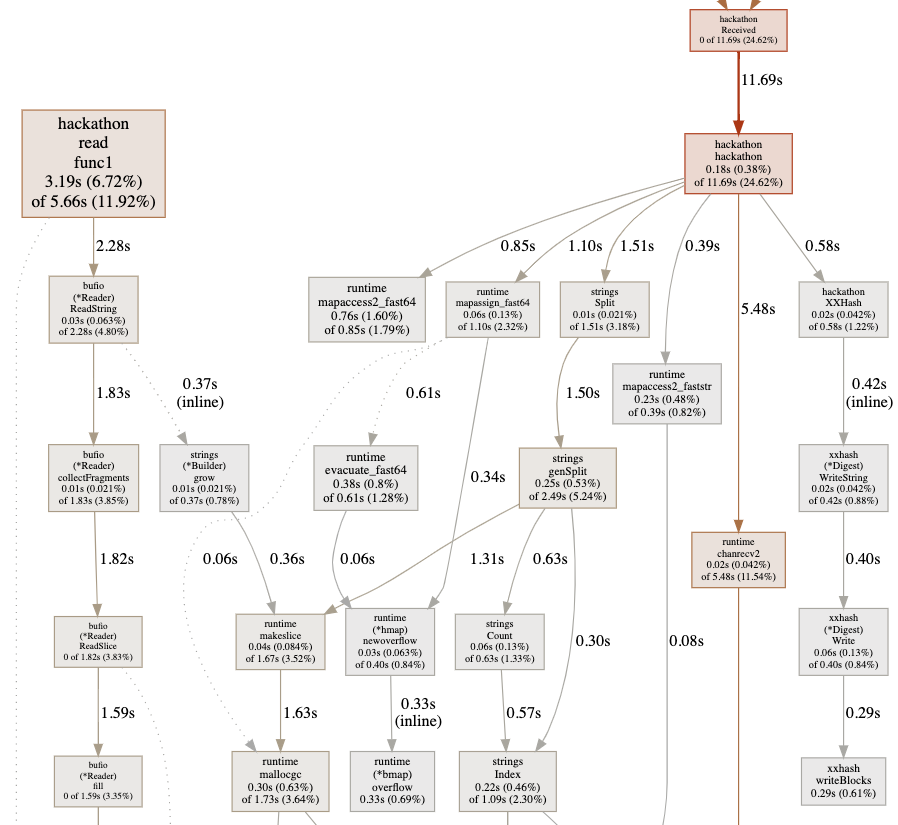
Go pprof
为待测代码编写 Benchmark* 测试方法后,即可进行性能测试。
package main

import "testing"

func BenchmarkReceived(b *testing.B) {
    for i := 0; i < b.N; i++ {
        Received("123",  6, "/Users/alphahinex/Desktop/hackathon/test1,/Users/alphahinex/Desktop/hackathon/test2,/Users/alphahinex/Desktop/hackathon/test3")
    }
}

func TestReceived(t *testing.T) {
    Received("123",  6, "/Users/alphahinex/Desktop/hackathon/test1,/Users/alphahinex/Desktop/hackathon/test2,/Users/alphahinex/Desktop/hackathon/test3")
}
可通过 go test 输出执行性能测试,并输出对应类别二进制文件(如 cpu.prof、mem.prof),之后通过 pprof 工具可视化查看。
$ go test -bench=. -cpuprofile=cpu.prof \
-memprofile=mem.prof -blockprofile block.out \
-mutexprofile mutex.out -trace trace.out
# http://graphviz.org/download/
$ brew install graphviz
$ go tool pprof -http=:8080 cpu.prof
代码仓库
http://osscoe.neusoft.com:8000/hackathon/cloudnative/team6
