Project Jupyter (/ˈdʒuːpɪtər/) 是一个旨在开发跨多种编程语言的交互式计算的开源软件、开放标准和服务的项目。
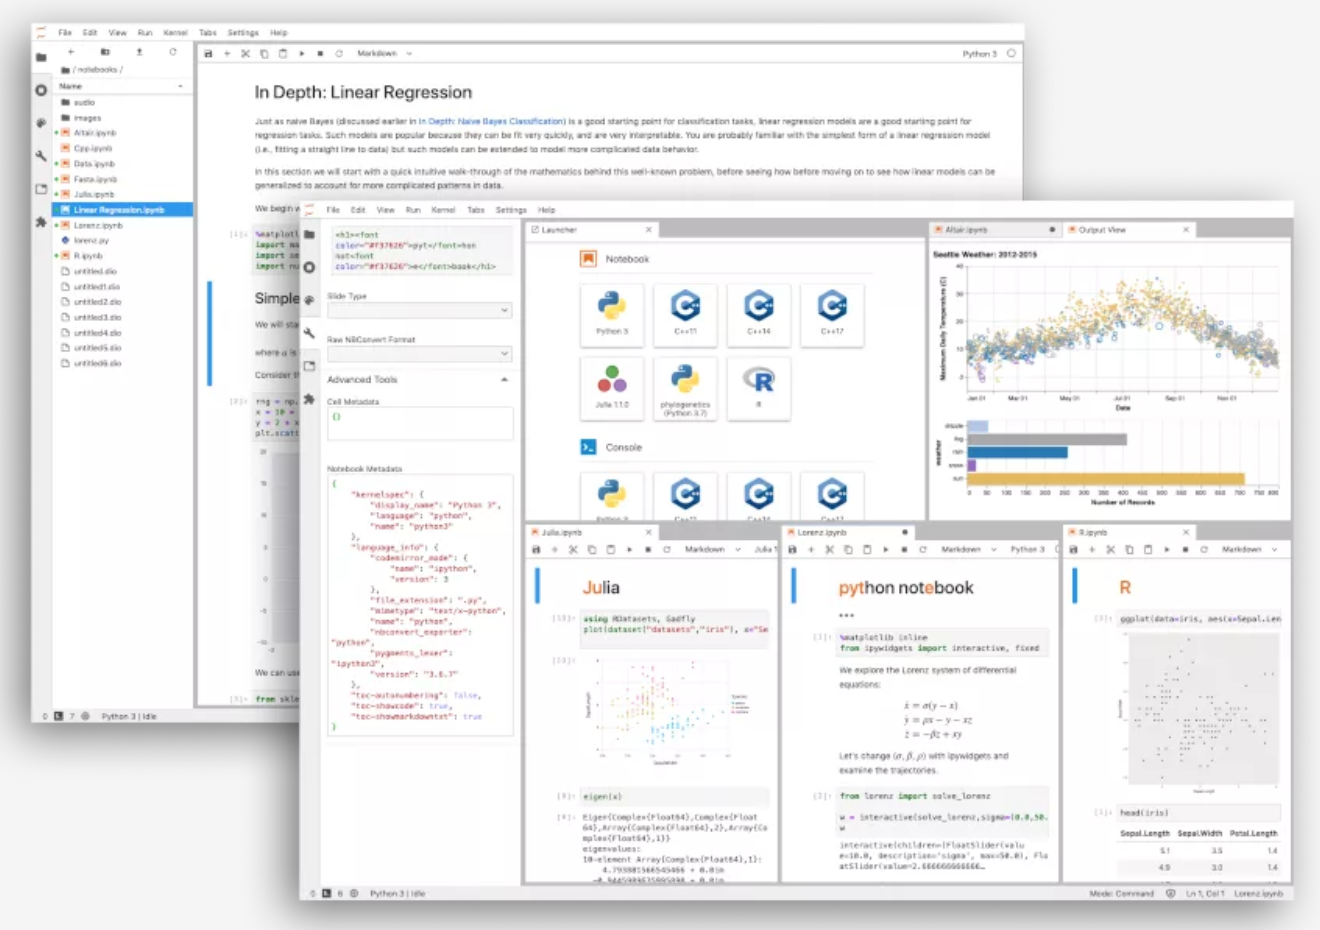
Project Jupyter 已经开发和支持了交互式计算产品 Jupyter Notebook 和 JupyterLab。
Jupyter Notebook 是经典的 Notebook 交互界面,JupyterLab 是下一代的 Notebook 交互界面。
本文主要介绍 JupyterLab 环境搭建,包括远程密码访问及添加 Kernel 以支持其他语言。
演示环境准备
容器
本文以在 docker 容器中搭建 JupyterLab 为例进行说明:
# 拉取 python 镜像
$ docker pull python
# 启动容器并映射 8099 端口作为访问 JupyterLab 的端口
$ docker run -d --name pycontainer -p 8099:8099 python tail -f /dev/null
# 进入容器
$ docker exec -ti pycontainer bash
miniconda
虚拟环境的管理以使用 Miniconda 为例,在上面准备好的容器中,安装并初始化,使用 Quick command line install 中提供的 Linux 环境安装语句:
$ mkdir -p ~/miniconda3
$ wget https://repo.anaconda.com/miniconda/Miniconda3-latest-Linux-x86_64.sh -O ~/miniconda3/miniconda.sh
$ bash ~/miniconda3/miniconda.sh -b -u -p ~/miniconda3
$ rm -rf ~/miniconda3/miniconda.sh
因为本文准备的容器中只有 bash shell,使用如下命令进行初始化:
$ ~/miniconda3/bin/conda init bash初始化后需要重新进入一次终端使配置生效,可退出容器之后再次进入。
上面 wget 的地址如果下载较慢,可改为使用清华大学开源镜像站中的地址 https://mirrors.tuna.tsinghua.edu.cn/anaconda/miniconda/Miniconda3-latest-Linux-x86_64.sh ,并为
Anaconda配置国内镜像源:
# 添加 channel
$ conda config --add channels https://mirrors.tuna.tsinghua.edu.cn/anaconda/pkgs/free/
$ conda config --add channels https://mirrors.tuna.tsinghua.edu.cn/anaconda/pkgs/main/
$ conda config --add channels https://mirrors.tuna.tsinghua.edu.cn/anaconda/cloud/conda-forge/
# 查看 channel
$ conda config --show channels
# 设置搜索时显示 channel 地址
$ conda config --set show_channel_urls yes
# 删除指定源
# conda config --remove channels 源名称或链接
conda config --remove channels defaults
为 JupyterLab 创建一个新的虚拟环境 lab_env:
# 新虚拟环境中 Python 版本使用 3.12
$ conda create -n lab_env python=3.12
# 激活虚拟环境
$ conda activate lab_env
至此,本文用来演示的搭建 JupyterLab 的基础环境已经准备好。
不再需要这个演示的虚拟环境时,可以通过下面方式移除:
$ conda deactivate
$ conda env remove --name lab_env
安装 JupyterLab
可按 官方文档 使用 pip 进行安装:
$ pip install jupyterlab
# pip install jupyterlab -i https://mirrors.tuna.tsinghua.edu.cn/pypi/web/simple/
也可以直接使用 conda 安装:
$ conda install jupyterlab
# 安装后查看版本
$ jupyter --version
Selected Jupyter core packages...
IPython          : 8.20.0
ipykernel        : 6.28.0
ipywidgets       : not installed
jupyter_client   : 8.6.0
jupyter_core     : 5.7.1
jupyter_server   : 2.12.4
jupyterlab       : 4.0.10
nbclient         : 0.8.0
nbconvert        : 7.14.1
nbformat         : 5.9.2
notebook         : not installed
qtconsole        : not installed
traitlets        : 5.14.1
此时就可以启动 JupyterLab 了:
$ jupyter lab但因为我们是在容器中启动的服务,默认配置是不能直接访问的,需要调整配置以允许远程访问。
密码登录及远程访问
JupyterLab 可以通过启动参数及配置文件对默认配置进行调整。
先来看下配置文件的方式:
# 生成配置文件
$ jupyter server --generate-config
Writing default config to: /root/.jupyter/jupyter_server_config.py
生成的 jupyter_server_config.py 配置文件内容较多,可以根据需要对配置进行调整,允许远程访问和密码登录(及其他几个参数)的配置可参考下面内容:
# Configuration file for jupyter-server.

c = get_config()  #noqa

## Allow requests where the Host header doesn't point to a local server
#
#         By default, requests get a 403 forbidden response if the 'Host' header
#         shows that the browser thinks it's on a non-local domain.
#         Setting this option to True disables this check.
#
#         This protects against 'DNS rebinding' attacks, where a remote web server
#         serves you a page and then changes its DNS to send later requests to a
#         local IP, bypassing same-origin checks.
#
#         Local IP addresses (such as 127.0.0.1 and ::1) are allowed as local,
#         along with hostnames configured in local_hostnames.
#  Default: False
c.ServerApp.allow_remote_access = True

## Whether to allow the user to run the server as root.
#  Default: False
c.ServerApp.allow_root = True

## The IP address the Jupyter server will listen on.
#  Default: 'localhost'
c.ServerApp.ip = '*'

## DEPRECATED in 2.0. Use PasswordIdentityProvider.hashed_password
#  Default: ''
# c.ServerApp.password = ''
c.PasswordIdentityProvider.hashed_password='argon2:$argon2id$v=19$m=10240,t=10,p=8$77oaPHievVOfjuE0GHjaSA$eBTBF0mfA5qSOJq4ou3fBYeDE70x72xnaF1SYo2D034'

## The port the server will listen on (env: JUPYTER_PORT).
#  Default: 0
c.ServerApp.port = 8099

## The directory to use for notebooks and kernels.
#  Default: ''
c.ServerApp.root_dir = '/root'
其中密码的 hash 值可以通过如下方式获取:
$ python
Python 3.12.1 | packaged by conda-forge | (main, Dec 23 2023, 08:03:24) [GCC 12.3.0] on linux
Type "help", "copyright", "credits" or "license" for more information.
>>> from jupyter_server.auth import passwd
>>> passwd('hinex')
'argon2:$argon2id$v=19$m=10240,t=10,p=8$77oaPHievVOfjuE0GHjaSA$eBTBF0mfA5qSOJq4ou3fBYeDE70x72xnaF1SYo2D034'
或:
$ jupyter server password
Enter password:
Verify password:
[JupyterPasswordApp] Wrote hashed password to /root/.jupyter/jupyter_server_config.json
$ cat /root/.jupyter/jupyter_server_config.json
{
  "IdentityProvider": {
    "hashed_password": "argon2:$argon2id$v=19$m=10240,t=10,p=8$7wNypI7oYGfIR5fmStC8AQ$SraH34Dd2Oj4o2cnfI7MMEP/0CEnm7N7GgdfU6b6l1s"
  }
}
将宿主机中准备好的配置文件拷贝至容器中(因为容器内没有文本编辑器):
docker cp ~/Desktop/jupyter_server_config.py pycontainer:/root/.jupyter/之后再次启动 JupyterLab 即可通过宿主机的 8099 端口访问到界面了:
$ jupyter lab
多个配置
因为默认的配置文件是放在用户的 ~/.jupyter 路径下,在一个环境中想启动多个不同配置的 JupyterLab 服务的时候,就需要通过 --config 参数指定配置文件路径,或通过启动参数传入配置:
$ jupyter lab --no-browser --ServerApp.port=8090 --ServerApp.root_dir=/root --PasswordIdentityProvider.hashed_password='argon2:$argon2id$v=19$m=10240,t=10,p=8$7wNypI7oYGfIR5fmStC8AQ$SraH34Dd2Oj4o2cnfI7MMEP/0CEnm7N7GgdfU6b6l1s' --ServerApp.allow_root=True --ServerApp.ip='0.0.0.0'或:
$ jupyter lab --config=/root/jupyter_server_config.pyKernels
Jupyter 官网中提到:
Jupyter supports over 40 programming languages, including Python, R, Julia, and Scala.
这需要 Jupyter kernels 的支持来实现。
安装的 jupyterlab 依赖中,包括了第一个 Kernel —— ipykernel,所以我们可以直接使用 Python 代码进行交互式计算:
下面命令可以查看当前环境中存在的 kernel 列表:
$ jupyter kernelspec list
Available kernels:
  python3    /root/miniconda3/envs/lab_env/share/jupyter/kernels/python3
目前只有默认安装的 kernel,接下来我们安装一个新的 kernel。
Bash Kernel
pip install bash_kernel或:
conda install bash_kernel此时,我们的 kernel 列表中出现了新的 kernel:
$ jupyter kernelspec list
Available kernels:
  bash       /root/miniconda3/envs/lab_env/share/jupyter/kernels/bash
  python3    /root/miniconda3/envs/lab_env/share/jupyter/kernels/python3
重启 JupyterLab,在界面中调整 kernel 为 Bash,就可以在 notebook 中执行 bash 命令了:
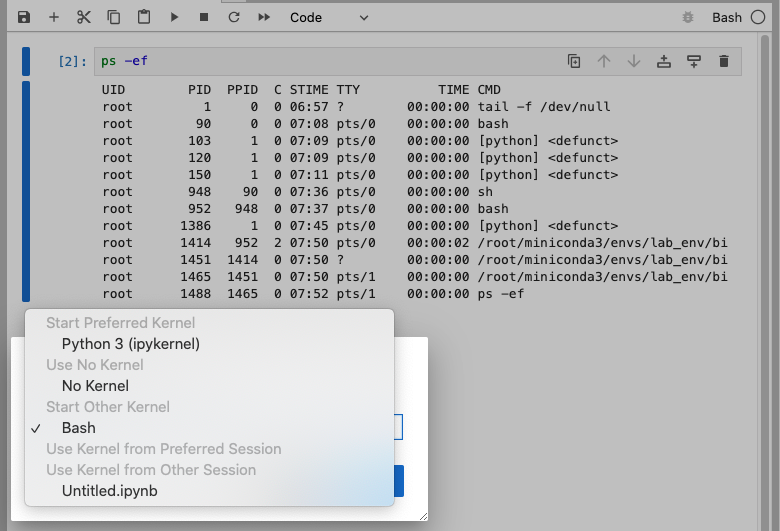
调整 kernel
- 修改 kernel 在界面中的显示名
- 使用
jupyter kernelspec list查找 kernel 安装路径 - 编辑其中的
kernel.json文件,修改display_name属性中的显示名
- 移除 kernel
$ jupyter kernelspec remove bash参考资料
- Jupyter Lab 密码登录、远程访问
- 给jupyter设置密码以能远程访问的方法
- PasswordIdentityProvider.hashed_password not working or ignored on AWS ECS
- Jupyter Notebook Kernels: How to Add, Change, Remove